Origin Coffee Oatmeal Stout simple all extract recipe
How to brew this amazing coffee oatmeal stout without mashing


It is only your donations that keep this website going. If we've helped you, please pay the favour forward and help others by keeping this content alive. You can do this by clicking here and donating. Thank you, for whatever you decide to give.
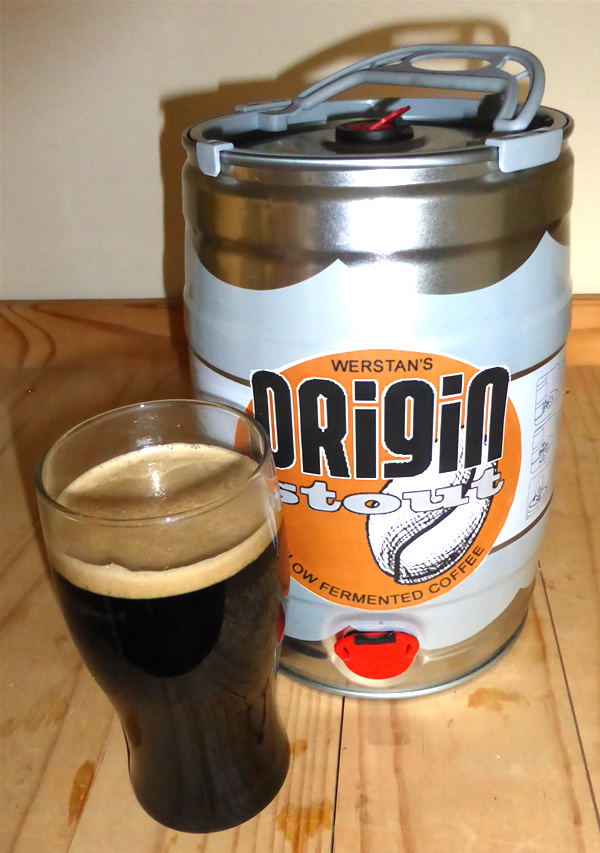
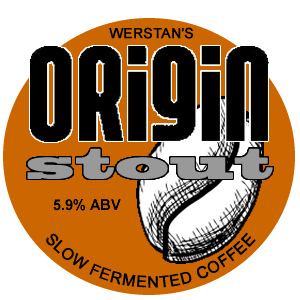 Origin Coffee Oatmeal Stout is a beautiful rich and silky 5.9% ABV stout with a taste of chocolate behind a fragrant hint of coffee. As the strap-line goes, it really is "slow fermented coffee". I have been brewing Origin Stout "locally" for some years and it has proved to be very popular. Occasionally someone asks how they can brew it. So this year I decided to see if it was possible to brew a 'copy' of Origin without a full mash and using only extract by adapting a beer kit so any beginner can have a go. It took a little experimentation, but I finally came up with this recipe which works very, very well. OK it'll never match the original Origin oatmeal stout in a competition, but it's still delicious. It only takes 1 hour to prepare - so give it a go!
 -
-
- This is a simple all extract recipe for a coffee oatmeal stout so just buy a Coopers Irish Stout beer kit as this provides the closest base. You can use other brands/types of stout kit, but Coopers will give you a brew that tastes very close to the original Origin Coffee Oatmeal Stout. This kit should contain everything you need bar the brewing sugars, coffee and oatmeal. Anyway, the list of ingredients are:
-
- 1 x Coopers Irish Stout beer making kit (for 5 gallons to make 4 gallons of Origin stout)
- 1 kg of brewers sugar or white granulated sugar (do not use invert sugars like syrups as it does not work well for this brew. Ordinary white granulated sugar works very well though)
- 500g of rolled oats (porridge)
- 60g of fresh ground coffee (I use Origin "Fazenda Mariano" Brazilian Coffee, but and rich coffee blend will do)
-
-
- It's all about the equipment, with brewing, but I gave myself a target to make this as simple as possible so even a beginner will have the right stuff. So for this simple version all you'll need is:
- 1 x primary fermentation bin
- 1 x greater than 4 gallon keg or 32 pint bottles (4 gallons)
- 1 x small piece of net curtain
- 1 x beer thermometer (or a thermometer capable of measuring 18*C to 21*C accurately!)
- 1 x bottle of bleach (for sterilising equipment)
-
- For the more experienced amongst you please feel free to use all your equipment, but honestly my test brew was great even done this way and came quite close to my "full mash" Origin Stout. Yup, I was shocked myself!
-
-
 This really couldn't be easier - in fact it's even easier than using the traditional all extract brewing approach for a stout as you'll just be adapting a beer kit, so don't worry if you're a beginner - the key to success is to follow the instructions!
 -
- BEFORE YOU START: It is very important to sterilise and clean the equipment. The cheapest way to do this is with a dilute solution of household bleach. Just put bleach in your basin and fill it with water - then use this to wash each of your items. Before thoroughly cleaning off the dilute bleach with lots of fresh water, you need to leave an item on one side for 10-15 mins so the bleach can kill all the bacteria. Do make sure that you thoroughly wash off the bleach before using your equipment. Anyway, on the the beer making process:
-
- 1. Place 500g of rolled oats (porridge) in a pan and 4 pints of water (or there abouts!) and bring to the boil while stirring. Your aim here is to make a creamy porridge, if it becomes too thick, add more water. For the more experienced brewers amongst you, seriously don't bother trying to replicate mashing temperatures, this basic approach works perfectly well with a beer kit as we're only after a thickening agent for the stout to imitate the creaminess of the original 'full mash' Origin. Anyway, after 10 mins or once the rolled oats have softened and your porridge is the consistency of thick cream, turn off the heat and put to one side to cool. Once cool enough to handle, cut a piece of net curtain or similar and strain the porridge through it. You need to retain the lumpy rolled oats in the net curtain and squeeze out the sticky starch rich liquor into a bowl.
-
- 2. Put your can of stout malt from your beer making kit (preferably Coopers Irish Stout) into a large basin of hot water and leave it to get warm (warm malt flows more easily). Once it is warm open it and pour the contents into your fermentation bin.
-
- 3. Now add the starch rich liquor from your strained porridge to the fermentation bin. Add 5 pints of boiling water and 500g of sugar to the bin before stirring the mixture thoroughly - make sure all the sugar is dissolved. Now top up the bin with cold water to the 4 gallon mark (do not top up to the 5 gallon mark as indicated on your beer kit or it will not taste like Origin Stout!).
-
- 4. Check the temperature is 21*C and then pitch in your yeast; the SG at this stage should be around 1.054 at 21*C. Leave to ferment for 7 days at 21*C or for those of you with a little more equipment until active (frothy) fermentation has finished and the SG has dropped to 1.012 at 21*C.
-
- 5. Now it's time to add that distinctive coffee flavour of the original Origin Coffee Oatmeal Stout. I use a special coffee blend from Origin in the original recipe, but if you can find a fresh coffee with a pronounced toffee and vanilla flavour you won't be far off the original recipe's taste. Brew up about 60g of coffee (or 8 cups worth) and leave this to cool. When the temperature of the coffee has dropped to below 25*C you'll be ready to add it to your beer - but don't add it just yet as there's some more stuff to do first!
-
- 6. If you have another spare fermentation bin then the beer will really benefit from dropping at this stage and you should carefully transfer it to the new bin leaving behind all the sediment in the old bin. If you are kegging the beer, then you can drop it at this stage to the keg (again carefully leave behind the sediment), but first make sure you add 26g of white sugar to the keg to prime it for condition venting. If you do not have a spare bin and are bottling rather than kegging the beer, then leave it alone and skip this step.
-
- 7. When the temperature of the coffee has dropped to below 25*C you should add it to your beer and slowly stir it in. If you are still using your original fermentation bin, be very careful not to stir up the sediment at the bottom of the bin when you do this. You now need to leave the beer to condition for 6 more days at approximately 18*C. If you have kegged at this stage then after you have added the coffee and stirred it in, tighten the cap and seal the keg. You now need to loosen the cap on the keg and gently blow off the gas every 3 days during the 6 day period. Once the gas has blown off and there is no more hissing, retighten the cap immediately. This process should help bring the stout into condition more effectively by allowing some of the off flavours to exit the keg early in the process.
-
- 8. Finally, if you haven't already done so, it's time to keg or bottle your Origin coffee oatmeal stout - you should find that the SG is now about 1.010 at 21*C, but don't worry too much about this! I never prime my full mash brews, but strangely this version of Origin stout does benefit from priming with white sugar. If you haven't already kegged your beer, I would recommend 26g of sugar in the keg or split between your bottles for this purpose. If you have kegged your beer already do not add any more sugar!
-
- 9. That's it! Set stout aside for at least 1 month in a cool location (even longer for bottles). It will come into perfect condition after 2 months and I expect it to hold this condition for 8 months at least (the original Origin Coffee Oatmeal Stout kept well in bottles for up to 2 years). Do not drink it before 1 month, you will hate it as it will taste like a chemical soup - this after all is a strong, dark and traditional oatmeal stout; so give it some time to condition and mature! When you do crack it open you should have a wonderful creamy oatmeal stout with a hint of coffee and toffee. OK it's not as exceptionally complex as the "original" Origin Coffee Oatmeal Stout, but it's very, very close and amazingly good for a beer brewed from a kit.
-

 Origin Stout - Now even a beginner can brew this classic coffee oatmeal stout

