

 It is only your donations that keep this website going. If we've helped you, please pay the favour forward and help others by keeping this content alive. You can do this by clicking here and donating. Thank you, for whatever you decide to give.
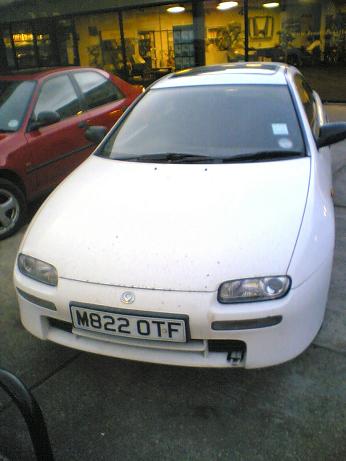
- I used to own a Mazda 323F 1.8 BA shape (mid 1990's) called 'MOFF' - you can see him in the picture opposite. Without a doubt the 323 F was one of the best cars I've ever owned (I've owned and restored quite a few cars) and even the wife liked him. So if you fancy some cheap thrills, go get one! Unfortunately as the family grew, the 323 became too small and we needed a bigger motor, so MOFF had to go. This guide is dedicated to him - MOFF we'll miss you!
- I wrote this guide some time ago around the time the cam belt required replacement. If anyone has any info on timing marks for the 1.3, 1.5 and 2 litre please use the contact link on this site to let me know so I can add it to this guide (it should be in the workshop manual). This guide specifically relates to the Mazda 323 F 1.8 BA, but can be used for any other Mazda 323 F engine size as long as you have the timing positions (you’ll find these in a Haynes Manual). Indeed you can use this guide as a general primer on how to replace the cam belt in any car. Basically the process will be the same only the details might change – Good luck!
- Getting the right result without spending hours or skinning your knuckles is all about having the right stuff handy. What you need for this job is:
- - 2 axle stands (you could get away with one)
- 1 Jack
- Full box socket set (you may also need an 18mm 'Deep' socket - read on for why)
- Ring spanner set
- long nosed pliers (if replacing tensioner)
- mole grips (like lockable pliers - dead useful!)
- Screwdriver set
- Spark plug remover
- Envelopes
- Micro tippex pen
- Ruler/Straight edge
- Ciggies
- 5 Gallons of Home Brew
- Decent stereo - I would recommend that if you are going to do this job you should do the full monty. The job isn’t a hard one but the amount of stuff you have to take off isn’t small, so why just replace the bare minimum of stuff when it’s all lifed to about the same time? It’s going to cost you an extra £80 to replace everything – water pump, cam belt, idlers and tensioners. The whole job will come to around £120 if you replace everything, the equivalent garage job would cost you about £300 - £400 so you’ll be saving loads, and you’ll never need to worry about it again for 54K miles. However, if you just replace the cam belt, you could end up (which is what happened to me!) taking the whole thing off 3 days later to replace the water pump.
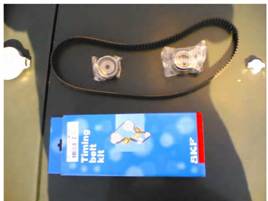
The Timing belt kit you’ll need for the full replacement – note idler and tensioner in packets.
- Still if you decide you can’t afford £120 then you could just replace the cam belt and the whole job will only cost you around £30. A word of warning though – don’t go to a Mazda dealer to get your parts or you’ll pay a fortune. Bog standard repro auto-factors belt £27+vat or £57 for the kit. Equivalent Mazda dealer belt £90+vat for the kit!
- I ended up doing the full monty and paid:
- £66.98 for cam belt kit (repro)
- £54 for water pump (repro)
- £4.30 for Hylomar Universal Blue gasket sealer (it’s the best)
- £4 for a 18mm deep socket (I had 17mm and 19mm but not 18mm!)
- ___________
- Total: £129.28
- Equivalent garage cost: £300 – £400
- Saving you: £170.72 – £270.72
- However, if you wanted to do it on the cheap:
-
- £32 for a cam belt
- ___________
- Total: £32
- Equivalent garage cost: £100 - £200
- Saving you: £68 - £168
- The whole job’s going to take you around a day. It took me 4 ish hours but it did start raining half way through so I went to the pub! If you’ve not done anything like this before then start it Saturday and don’t plan to go anywhere Sunday, just in case!!
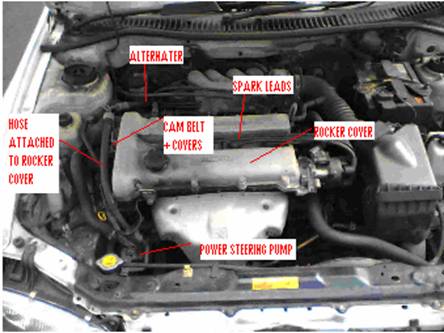
- Before you start familiarise yourself with the location of everything under the bonnet (see picture below)
- Rather than giving myself wrist ache :) trying to type out ‘driver’s side’ or ‘left hand side of the car when looking from the front of the car’, I’ll instead use the standard terms you’d hear in a garage. These are ‘Off side’ (driver’s side) and ‘Near Side’ (passenger side – or the nearest side to the curb!). You can then combine these with things like ‘Off Side Front’ (Front of the car on the drivers side) or ‘Near Side Rear’ (Back of the car on the passenger side). You might also see ‘Off Side Rear of the Engine’ which doesn't’t mean you’ve got an engine ‘stuck on your drivers side rear wheel arch’, it means the ‘Back of the engine on the drives side of the engine’.
- However, these all take time to type so I’ll use the standard abbreviations which are:
- OSF (Off side front)
- OSR (Off side rear)
- NSF (Near side front)
- NSR (Near side rear)
- Phase 1. Removing Stuff
- Before you start pop the bonnet, put the car in neutral and start her up. Note which way the belts are turning on the OS of the engine. From that you should know whether your car’s engine rotates clockwise or anti-clockwise. Note this down you’ll need it later on. Then stop the engine before anything gets hot – you don’t want to burn yourself on the exhaust!
- First you need to jack the car up and whack it on some axel stands. Get it as high as you can as you’re going to be working under there. If you don’t know where to jack your car up then you’ll find help on this forum. Don’t jack it up just anywhere – use the jacking points and any large lumps of metal that look suitable (but not the engine/gearbox alright!)
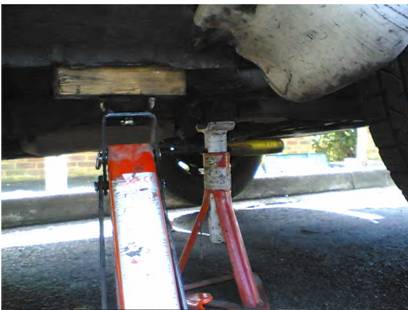
- The jacking points I used shown above
- Now it’s up, take off the OSF wheel. Next you need to drain the radiator if you are going to replace the water pump. If you’re going to skip the pump then don’t bother. Most cars seem to have a drain plug on the bottom of the radiator, but I couldn’t find it, and anyway it’s a lot easier and faster to just pull the bottom hose off. That’s the big hose on the off side (driver’s side) bottom of the radiator and it goes up to the pump, which is situated behind your cam belt. When you do this remember that very soon you’re going to be lying under the car so have a bucket ready – you do not want to be lying in a large puddle. Also, there is no reason to chuck this rad water away – it contains antifreeze and therefore it’s expensive, so it can be reused if it looks ok.
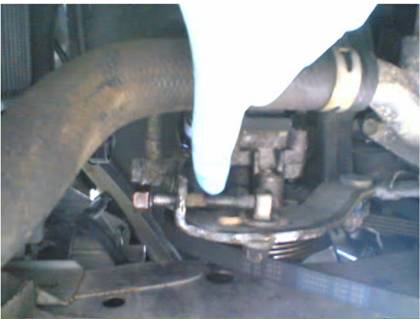
- Now you need to remove the two plastic shields that protect the bottom front of your engine and attach to the bumper and inside OSF wheel arch – see pictures. These panels have plastic locking screws as well as bolts. The locking screws can be opened by turning the inside portion of the screw head, while holding the outside ring of the screw head. It actually is easy and you’ll see what I mean when you come across them!
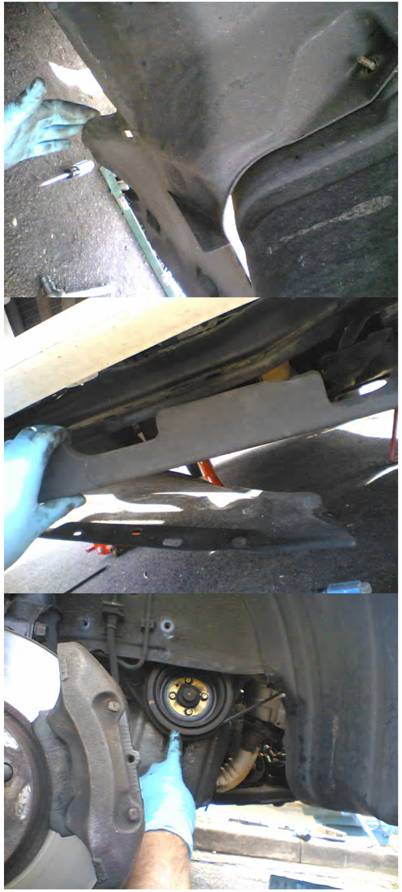
- Removing the plastic shields (above) giving access to the crank pulley
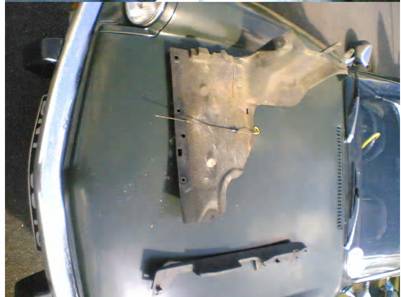
- The shields removed (above)
- Now remove your spark plugs and mark the spark plug leads so you know to which ‘hole’ they apply. Don’t drop anything down these holes once your sparks are out or you are in for a world of pain as they go right into your engine cylinders. Everyone does something like that once in there life, if they work on enough motors, and once you’ve done it you never ever forget! The best way is to put the leads back into the holes as you remove each spark.
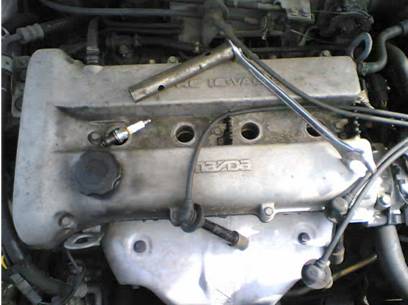
- Removing the spark plugs (above)
- Next it’s time to remove the power steering and alternator belts. These are the external belts on the OS of the engine. Before taking them off, get your tippex pen and mark each belt for direction and for what it is (Alternator, Power steering). Also note which pulleys each belt goes around – write it down in a diagram so you don’t forget! The belts can be removed by loosening the tensioning bolts at the power steering pump (OSF of engine) and alternator (OSR of engine). To make your life easier I’d also suggest you loosen the pivot bolts that allow your alternator and power steering pump to pivot and so tension the belt. Once all is loosened then you should be able to rock both the alternator and water pump forward and hence loosen the belts so you can remove them.
- Marking the belts for direction etc.(above)
- The belt tensioner bolts (above)
- Once you have the belts off you need to inspect them for damage. Cracks running across them are fine, missing ridges less than 1 inch in length are fine. But if you have missing ridges greater than 1 inch in length or have two adjacent ridges missing then you need to replace the belt.
- Checking the belts for cracks, both are fine (above)
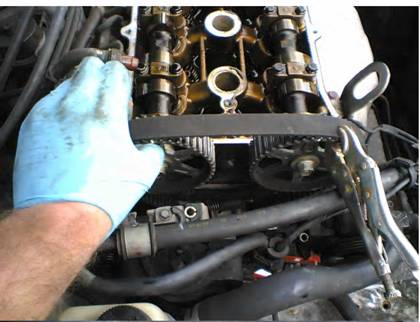
- Now this probably only applies to the 1.8 but it could apply to other models too, so take note! Basically you’re trying to get access to the whole of the cam belt. The cam belt is protected by a large plastic cover on the OS of the engine. The plastic cover is split into 4 sections to allow easy access, but on the 1.8 the top section is cut short and the two cam gears (the belt runs over them) are partially hidden under the rocker cover. The rocker cover is the big metal case that covers your engine and protects your valves and rockers from dirt – it has the oil plug in it through which you add engine oil if you are topping up your oil. If your engine is like this then you need to now remove the rocker cover. It’s easy and is held in by about 11 bolts – undo these in sequence a ½ a turn at a time until they are loose so you don’t warp the cover. Before you remove the cover pull off the two rocker cover feed pipes that go into it, and unbolt the pipe that is attached to it on the OS. Now take the cover off and putt it to one side. Remember to remove all the bolts from it so there is no chance of them falling into the spark plug holes – once it’s off put the spark plug leads back into the (now exposed) holes in the engine.
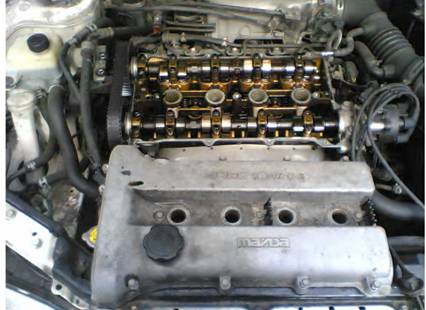
- Removing the rocker cover (above)
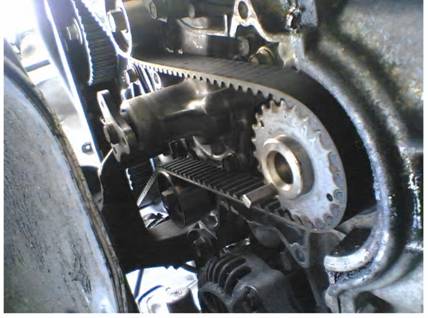
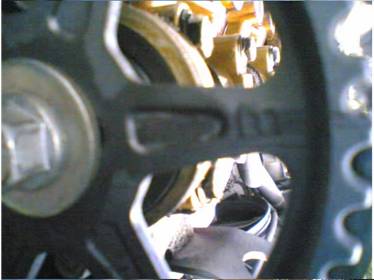
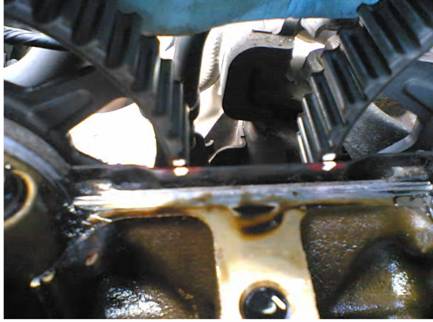
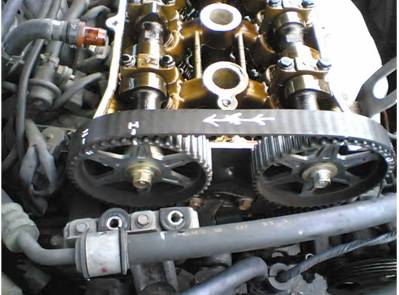
- With the rocker cover off you can now see your cam/cams. If like mine you have a twin overhead cam (2 cams at the top of the engine), you’ll see two gears poking out on the OS of the engine with a belt over the top of it – this is your cam belt and cam gears.
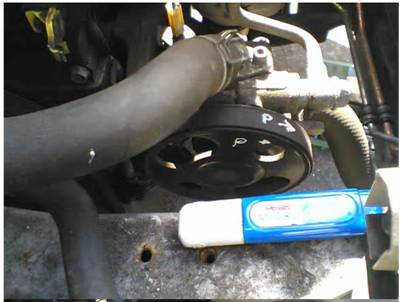
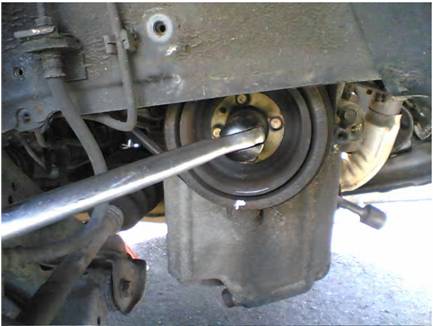
- Next you need to remove the water pump pulley. There are three blots on the pulley and they will be on tight so if you’re having problems getting them off while holding the pulley still to prevent it from turning, use the following technique: Get two ring spanners which fit the pulleys bolts. Put both on a bolt. Now you can use one spanner to give you the necessary leverage to hold the pulley still, while using the other to loosen a nut. Repeat this trick on all nuts until they are loose. The final nut is always a bit of a bugger as by the ‘holding’ spanner tightens one of the other loosened nuts when you attempt to undo it, but persevere!
- Removing the water pump pulley (above)
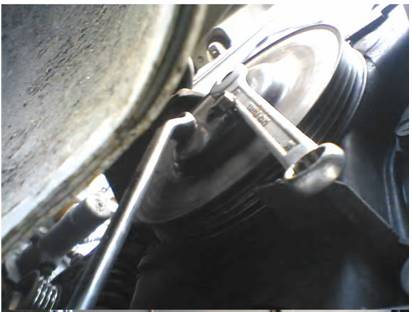
- OK, now it’s time to get on the ground! To get the cam covers off you need to remove the crank pulley. The crank pulley is attached to your crank shaft. Behind it, it has a gear over which your cam belt runs. The trouble is that the nut that holds your crank pulley on is very tight, and attached to a rotating object. If you try to loosen it you’ll just rotate the engine instead! You can get round this by jamming a screwdriver/tyre iron in the teeth of the flywheel (large geared wheel attached to the crank on the other side of the engine). Now when you try to loosen the bolt the screwdriver stops the flywheel from turning which prevents the engine from rotating – hey presto! You can get at the flywheel easily. The normal method for manual cars is to remove the starter motor (which turns the engine over by contacting with the teeth on the flywheel) – you can then get access to the flywheel teeth. Alternatively you may well find that your car is equipped with a flywheel access hole underneath the engine/gearbox and you can use this to jam the teeth. Either way approach this carefully – the flywheel is a big mother and you’re unlikely to do it damage, but you really don’t want to damage any of the teeth on it (so no hammering things in there)!

- How to jam the flywheel – note access hole used (above)
- Now you’ve jammed the flywheel you can remove the crank pulley nut – use a breaker bar or torque wrench, it’s a big one! You should now be able to carefully tap/pull the pulley off. Note there’s a woodruff key (sticking up ridge) in the cranks end that the pulley slots on to – it can fall out and get lost so be careful!
- Removing the crank pulley (above)
- With the pulley off you now have total access to the plastic cam belt covers. These are held on with about 8 bolts so undo them and remove the covers. They are a bit fiddley but they will come off – if you’re having problems check you really have removed all the bolts! Once off put them to one side and remember how to assemble them again.
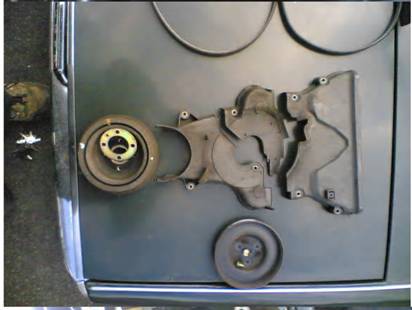
- The full assembly with plastic cam covers, crank and water pump pulley (above)
- Now you can relax, get a smoke, a beer and pat yourself on the back – you’re now looking at the cam belt!!!!
- The cam belt – note sticking out woodruff key on bottom gear (above)
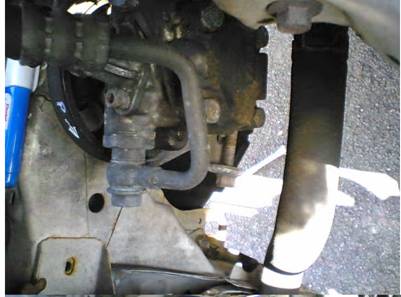
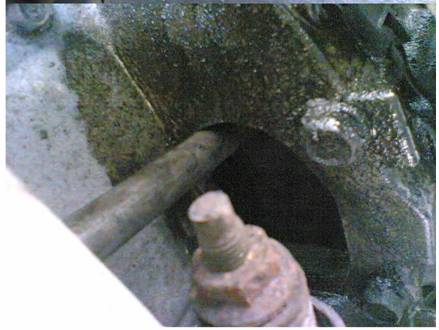
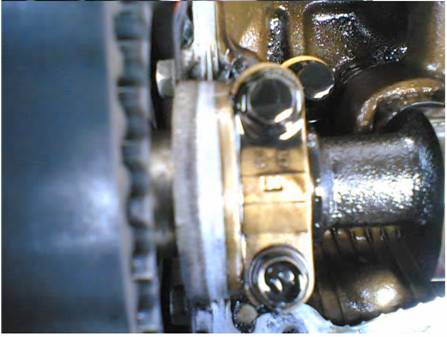
- Finally you may find as I did that you have to remove one of the supports for the engine to get the cam belt off. I found that a engine support which attached it to the chassis was attached directly through the middle of the cam belt! If this is the case you need to get a jack under the engine and carefully raise it until it is supporting the engine at the correct height. Now you need to remove the engine support section which fits into a hole in the cam belt housing and onto the chassis at the other end. This is where the 18mm deep socket cam in! Once you’re removed it be careful not to loose the two dishes that are put on the bolts holding it to the chassis.
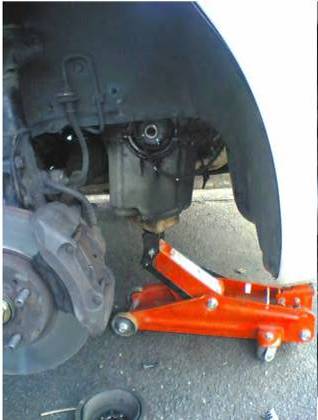
- Stick a jack under the engine (above)
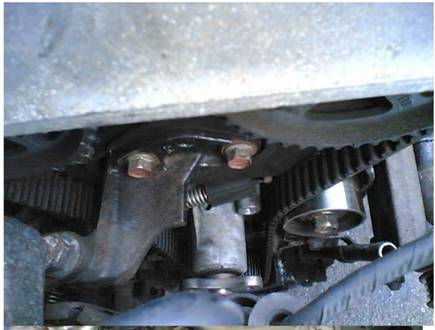
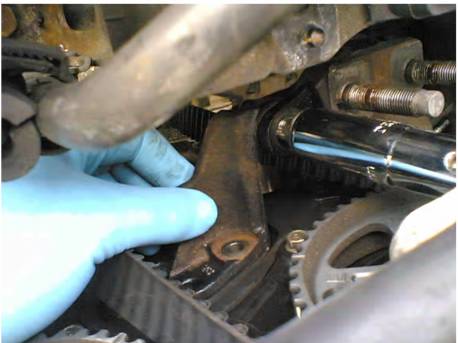
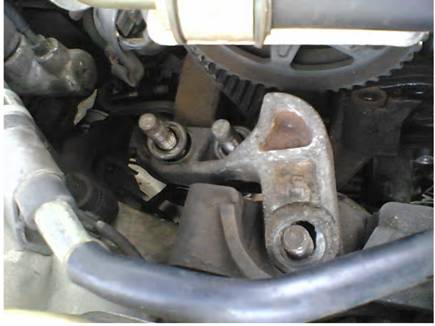
- Remove the engine mounting support – don’t loose the cups! (above)
- That’s it you now have all the bits off that you need to get at the water pump and cam belt. You may of course at this stage choose to perform a little victory dance – this is entirely optional, and if you fail to get the whole thing back together again, it could make you look really stupid.
- It was at this point it started raining and I left for the pub!
- Ah! how I love rain (above)
- Phase 2. Getting down to Business
- So how does a cam belt work? Well, the idea is that your crank pushes the pistons in your engine up and down as it turns, and in order to let exhaust gasses out/petrol air in to the engine the valves have to open and shut at the right time. Your rocker gear and cams (inside the rocker cover) take care of this but they need to be told when to open and shut. This is done by running a belt (with teeth) over the crank and over the cams so joining them together – your ‘cam belt’ or ‘timing belt’. As the crank rotates it pulls the belt round, which in turn pulls the cam gears round, which turns the cam which then drives the rocker gear which opens the valves! This of course all needs to be done at the correct time so it is *very* important that the belt is placed in exactly the right teeth on each gear it connects with, otherwise your cams may be opening the valves as your petrol in your cylinders goes bang or they may be shutting them when your cylinders want to get rid of exhaust gas – not what you want!
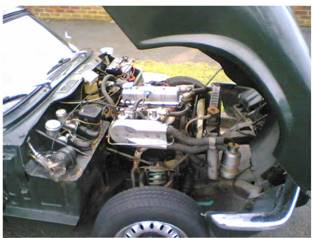
- The picture below if from my Spit (done at the same time) and shows a timing chain not a cam belt. This is the way it was done in the old days – with good old, unbreakable (yeah right!) metal chains. However, it gives you an idea of how it all works. The big gear is the one attached to my Spit’s single cam, the smaller geared wheel is the one attached to the crank. The white marks have been put on there (remember the tippex) so that I can be sure that the new chain will go on with the gears in exactly the same position as the old one. The same principle applies to cam belts, and this is how you’ll approach the Mazda cam belt.
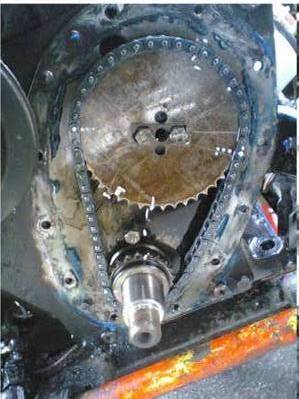
- Spitfire timing chain (above)
- Right, take a deep breath and let’s start the cam belt replacement. The first thing you need to do is rotate the engine to the correct position. This is achieved when the timing mark on the crank gear lines up with the mark on the engine block and the marks on the cam gear(s) align with their marks on the engine block or cam clamps. The easiest way to rotate the engine is to refit the crank pulley and lightly bolt it on. Then use this bolt and a box spanner to turn the engine clockwise. You may need to rotate the crank wheel several times until *all* the marks line up simultaneously.
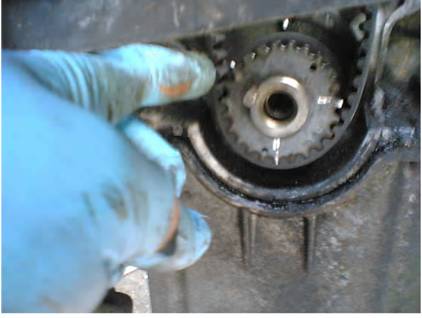
- Now this information only applies to the 1.8, you’ll need to check what your identifiers/marks are if you do not have a 1.8. The marks on the cam gear on the 1.8 are found on the spokes of the gear and under the rocker cover behind the gear on the cam clamps. The OSR gear has an ‘I’ on one it’s spokes – this needs to align with the ‘I’ on the cam clamp behind the gear. The OSF gear has an ‘E’ on one it’s spokes – this needs to align with the ‘E’ on the cam clamp behind the gear. The crank gear at the bottom of the engine has a notch on its back plate, this needs to align with the embossed arrow on the engine block behind it. You may need to rotate the crank several times until all the marks line up – even once you have them all aligned, don’t remove the belt yet!
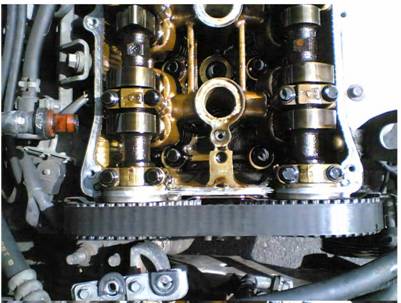
- Timing marks on the Cam gears (above)
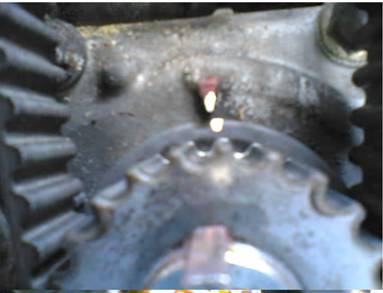
- Timing notch on crank gear (above)
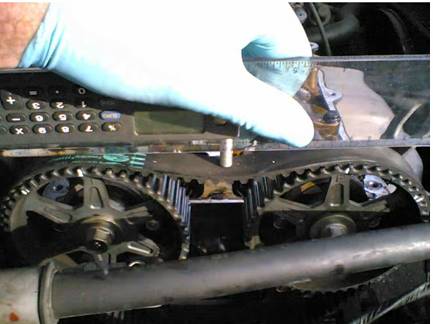
- You now need to mark up the belt, gear and block with your tippex so that you know the belts teeth will mate with the gear teeth on all three wheels in exactly the right position. If you’re really lucky you’ll find that some kind past mechanic may have blobbed paint on the gears already, if not mark all the gears in *two* places against suitable stationary bits of metal (eg. Engine block, back plate) so that if they move once you’ve taken the belt off, you’ll know and can move them back to *exactly* the right position – this is very, very important. Also just in case you can’t figure out the correct settings for the new belt, mark up the old belt in two places for each gear (mark the gears as well and which place applies to which gear) so that you can always put the belt back on in the same position with the same gear teeth mating to the same teeth on the belt. The easiest way to do this is to mark the belt on it’s side – this gear tooth to this tooth on the belt, kind of thing! Also you need to mark the direction of rotation on the old belt (you should be able to work this out from your notes – remember you ran the engine at the beginning of this job to find out which way it rotated). Finally, let me stress again – mark everything, do this for all gears (crank, cam, second cam if you have one) and don’t remove anything until you are absolutely sure, you have to be sure you can get everything back in *exactly* the same position!!!!
- Marking up Cam Gears (above)
- Marking up the Crank Gear (above)
- Mark up the old cam belt and positions against gears (above)
- Right, on to the easiest bit – removing and replacing the cam belt. Undo the cam belt tensioner blot a little (this is the round pulley that runs against the belt about half way down at the OSR of the engine, it has a spring clipped onto it to pull it against the belt). Now you’ve undone it a bit you should be able to rotate the tensioner back and away from the belt. The belt should now be loose enough to prise off. Now you have the belt off if you are replacing the water pump or the tensioner and idler then you need to undo the single bolts holding both the tensioner and idler pulleys completely (the idler pulley is the one that looks like the tensioner pulley but has no spring and is located at the OSF of the engine that contacts with the cam belt). Once you have the bolts out you should be able to pull off the idler pulley and unclip the spring and pull of the tensioner pulley. Next, if you are replacing the water pump you need to undo the bolts which hold it onto the block and also remove the two blots which hold the adapter for the pipe that goes to the rad (this is just bolted onto the end of the water pump). Once the bolts are undone you should be able to tap the water pump off with a soft block. With the pump off clean the hole and the whole cam belt area, so everything is free from muck and grease. These don’t mix with either cam belts or water pump gaskets!
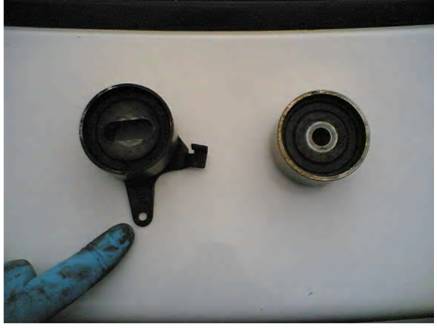
- Tensioner and idler pulleys now removed – note pivot on tensioner (above)
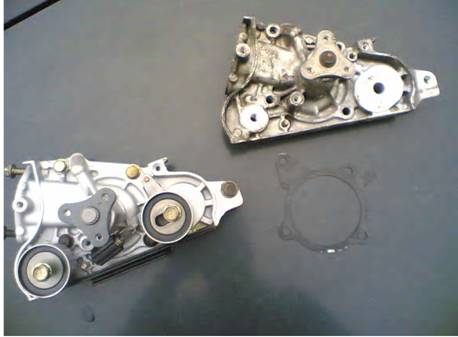
- The old and new water pumps, new with pulleys refitted – also note gasket (above)
- Phase 3 – Refitting
- If you removed the water pump, start with that. Reattach the fitment for the rad pipe and then get the new water pump gasket and put a thin layer of Universal Blue gasket seal on both sides, then fit it to the new pump. You’ll find that the sealer holds the gasket to the pump in the correct position so that you can fit it. Now refit the pump. Tighten the nuts fully, then wait 5 mins then tighten again. Finally refit the rad pipe.
- Use gasket seal on the water pump before fitting gasket (above)
- Now fit the new tensioner and idler pulleys. Then pull the idler pulley back against the spring to it’s fullest extent and lock it, so that when you fit the new cam belt it won’t be tensioning it.
- Next it’s time to fit the new cam belt. First check that all your gears are still in the correct (tippexed) positions, if they are not, carefully rotate them a little until they are. Now cam belts are handed for rotation, you’ll find arrows on the new belt specifying which way it rotates – fit the belt so that it rotates in the direction of these arrows when the engine starts. Now starting at the crank pulley/gear end and working anti-clockwise slip the new belt on. You can hold it in place on each cam gear by clamping it lightly in place with the mole grips before moving on to the next pulley. Make sure the belt is tight between each pair of pulleys before moving on. Once you have fitted the belt it’s time to tension it. You will find a tensioning marker at the crank gear end of the block, it looks like the timing marker explained earlier but it 60 degrees anti-clockwise from it. You need to rotate the crank gear, belt etc. through 1 complete turn anticlockwise and then rotate it that extra 60 degrees until the timing notch in the crank gear lines up with this tensioning marker. When it’s there release the clamp on the tensioner pulley so that it clamps onto the belt, then do up the bolt on the pulley so that it is locked in place. Now you need to rotate the crank, belt etc anti-clockwise until it lines up again with the timing marker at the top of the crank gear and then rotate again an extra turn until it lines up again with the timing marker (basically 1 and 5/6 turns in total). Now check all the tippexed markers all line up again on all pulleys/gears simultaneously. If they do – congratulations, you’ve just fitted the cam belt!!! If the tippex marks are really well out, then you probably just have not rotated the crank gear, belt etc. fully so just turn it through another turn to check if that’s the case – if all the marks line up then you’re ok and just couldn’t count! However, if they don’t line up, loosen the tensioner, remove the belt, realign the tippex marks and repeat the whole process until they do.
- Refitting the Cam Belt using grips –careful now! (above)
- Finally you need to check for correct tension in the cam belt. Do this by measuring the deflection at the centre point – it should be about 9 – 11 mm from memory. You can do this using a ruler and a bar, or you can make your own tool from a length of straight pipe with a hole drilled through it for an allen key.
- Checking the belt for tension (9mm – 11mm deflection (above)
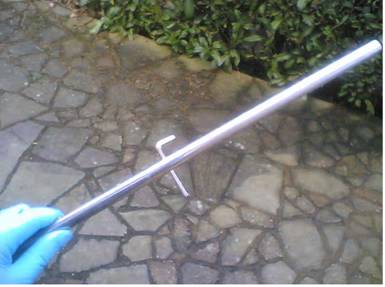
- Make your own deflection tool (above)
- That’s all there is to it! If you’ve got to here then just refit everything else in reverse order and you’ve done it. You’ll need to tension the other belts and check for deflection in the same way as the cam – I can’t remember the deflections but they are around 7mm – 9mm. However the easiest way is to tighten all belts to around the right tension and then when you start the car check for squealing. If it squeals tighten it some more until the belt stops squealing!
- A few things to remember: Remember to really tighten that crankshaft pulley nut and if you had to remove an engine mount then remember to replace it before removing the jack supporting the engine. Also if you did the water pump don’t forget to refill the rad. Oh and for the love of god remember to remove the screwdriver you used to jam the flywheel - it's always impressive seeing a smug mechanic starting a car and watching his £1.50 screwdriver strip the teeth of a £150 flywheel! Congratulations – you just did a cam belt change and saved yourself a fortune!
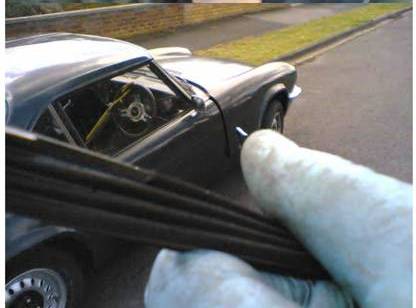
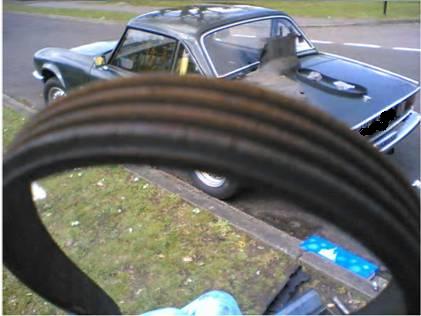
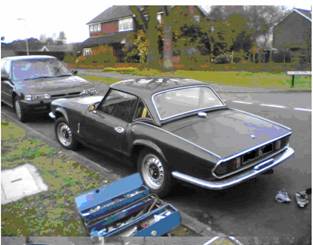
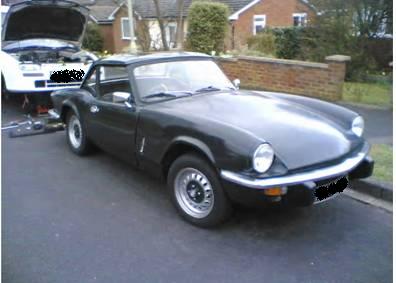
- Anyway hope you enjoyed the guide and good luck! If you’re wondering about the other motor shown in the photos that’s my 1971 spitfire. And how much easier were engines to work on in those days – now that’s what I call access!!!
MOFF - 1994 to 2012 R.I.P
PLEASE SUPPORT US |
| If we helped save you money, please pay the favour forward and help support the upkeep of this site and its guides for others. Just click a button below. |
 |
 |
 |
| Big thanks from us for your help! |
Please share your knowledge. |
| Many people have already helped others through this site by contributing information and techniques. If you have something you want to contribute, please click here to contact us. You'll be credited on this site and you'll have shared what you know to help the community. |
| Thanks to all who have contributed |